Bathrooms can be very slippery at times, especially the shower. Old people and children suffer the most when it comes to this thanks to lack of control.
So, how do you fix this?
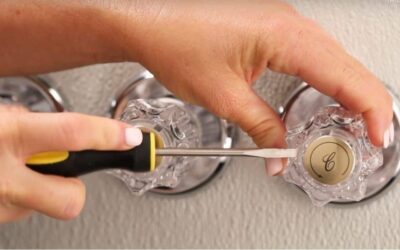
Well, the best solution to this would be installing a grab bar. But, what if your shower area is made of fiberglass?
You don’t have to worry any further, because we’ve got you covered. We put together this piece to tell you how to install a grab bar in a fiberglass shower.
Throughout the whole thing, we’ll introduce you to different ways to get the job done and also answer some questions that most people have after learning these ways.
So, we’ll jump right into the steps soon. But, before we get into the complete process, let’s check out the things you might need to get the job done.
Things You’ll Need
Here are all the things that you’ll need throughout the whole process. Check if you have all of them.
Now, that you know about what you’ll need, we can move on to the real deal. Ready to install that grab bar? So, let’s get into it.
How to Install a Grab Bar in a Fiberglass Shower
Installing a grab bar isn’t that hard if you know the most efficient ways to get the job done. So, we are going to show you two easy ways to get around.
One of them is an inexpensive option. The other one is a bit on the pricier side, but it is way easier to use than any other method out there.
So, here goes the thing-
Method 1: Installing the Grab Bar Using a Solid Mount
The first option on our list is installing a grab bar with a solid mount. Now, this is the more inexpensive option here. But, it demands hard work to get done.
But, to make things easier for you, we have optimized the amount of work that you have to do. Nothing more, nothing less.
To get through this you’ll need a solid mounting kit. These kits are specially made for installation in fiberglass showers. Pretty convenient, right?
The installation itself takes about an hour to complete. Moreover, thanks to this you won’t need to tear apart walls anymore.
So we’ll start off this amazing solution by seeing what comes with the kits so that you know you have everything in place. Let’s jump right in.
Things That’ll Come With Each Kit:
Each will hold these things:
- Mounting plates with threading cups- 2
- Lag bolts- 2
- Threaded mounting shafts- 2
- Self tapping screws-6
- Fender washers- 2
[Each Kit Can Be Used For 1 Grab Bar Only]
Once you buy your own kit, check if you have all of these things or not. Because without all of these, you won’t be able to finish installing the mount.
Now, as you’ve noticed, there are a lot of things to work with here. So, we’ll take you through the instructions with as much detail as you need.
Let’s get started with the work, shall we?
Step 1 of 4: Locate Stud
The first step here is to find the spot where the studs are above the fiberglass shower wall. That way you’ll know where you can install the grab bar.
To do this, take a stud finder and locate these spots. Once you’ve found them, markt their centers. After that, draw a vertical line between the studs to mark the centre.
Now that you have located where to place the grab bar, you have to fix the location for the mounting bracket. Let’s see how you can do that in the next step.
Step 2 of 4: Set Location for Mounting Bracket
Mounting Brackets are the foundations for your grab bar. So you need to be extra careful while both determining its location and installing it.
Now, you don’t want someone to have an accident just because the mounting bracket fell off, right? To ensure this, you’ve to make sure that the mounting bracket is well placed.
So, how do you do that?
Well, you start by aligning the mounting flanges at the end with the centerline of the studs. Then while holding the grab bar in place, you draw a circle around one of the ends of each flange.
That’s it. Now your mounting bracket is also well located. That was pretty easy, right? Well, we just got started.
Now, let’s move on to the next step and see how you can install the whole mounting bracket.
Step 3 of 4: Install the Mounting Bracket
As we mentioned before, the mounting bracket is the foundation of your grab bar. So, this step is the most important step of them all.
This might take a while. So, buckle up.
Start by aligning the centerline with the stud centerline. Remember the flange circles that we just drew? Align them with outer marks on the fiberglass wall.
Once you’ve done the alignment, use the center mark and drill a â…› inch hole before drilling the 2 inch hole to verify the stud location. Just to be safe.
After verifying the stud location, drill the 2 inch hole in the fiberglass wall with a hole saw.
Now, measure the distance from the stud to the outer surface to find where to cut the threaded part. Once measured cut the threaded parts.
Call a professional to do the measurements for you here because they are crucial. Now, drill a hole at the center of the stud with a 3/16 inch drill bit.
Make sure that you’re centered on the 2 inch hole and the stud. Then insert the lag bolt with all the other required parts into the starter hole and tighten it.
Now, slowly apply a bead of silicone caulking around the 2 inch hole. After this, screw the mounting bracket on the threaded part attached to the stud.
Keep tightening until the mounting bracket touches the fiberglass wall. Once that is done, wipe off the excess caulk.
Now hold one end of the grab bar on the mounting bracket that you just installed. align the center of the other end of the mounting flange to the stud centerline on the fiberglass wall.
Keeping the grab bar in place, draw a line to mark where the next mounting bracket should be and follow the whole process again to install the other one.
Now that we have installed the mounting brackets, we can finally install the grab bar. So let’s jump right into it.
Step 4 of 4: Install Grab Bar on to Mounting Bracket
The hard part is done. Now, all you have to do is screw the grab bar into place. Start by holding the grab bar against both the mounting brackets and marking the screw holes.
Drill holes into the marked spots with a 5/32 inch drill bit. While holding the grab bar in place, screw it into the mounting brackets using the self tapping screws.
That’s how you can install a grab bar in a fiberglass shower using a solid mount. Now, let’s check out the alternative.
Method 2: Installing the Grab Bar Using a Suction Cup Grab Bar
Suction cup grab bars are a more expensive option. But they make up for it through convenience and portability. So, let’s see how they work.
Installation is super easy and doesn’t need any work at all. Here’s how to install.
- Find the place where you want to set the grab bar.
- Place the grab bar in place.
- Turn on the suction by pulling the small levers on both sides.
That’s it. Your grab bar has been installed. You can remove it by turning the suction off and pulling it off. As simple as that.
Those were the two ways of installing a grab bar in a fiberglass shower. Now, let’s answer some questions.
FAQs
Question: What kind of surface would be better for the suction cup grab bar?
Answer: The suction cup grab bar only works on smooth surfaces. It won’t grab onto any other surface.
Question: What can I use to verify the stud location?
Answer: A coat hanger should do the trick. But if you have trouble finding one at the time being, wires can do the trick as well.
Question: Can I reuse the screw holes after removing the screw from them?
Answer: Unfortunately, the answer is no. In no circumstance should you remove the screws and install them the same hole.
Parting Words
We want to make sure everyone in your household can take a shower without the danger of falling down. That is why we put this together.
We want you to know how to install a grab bar in a fiberglass shower, to prevent these accidents. Moreover, we showed you 2 ways to do so.
Now, the ball’s in your court. Weigh the differences and see which one suits you better. Then move on to installing it.
But, if you have enough money to spare, we would recommend the suction grab bar. That’s all from our side.
If you have anything else in mind, leave a comment below.
More Related Topics: