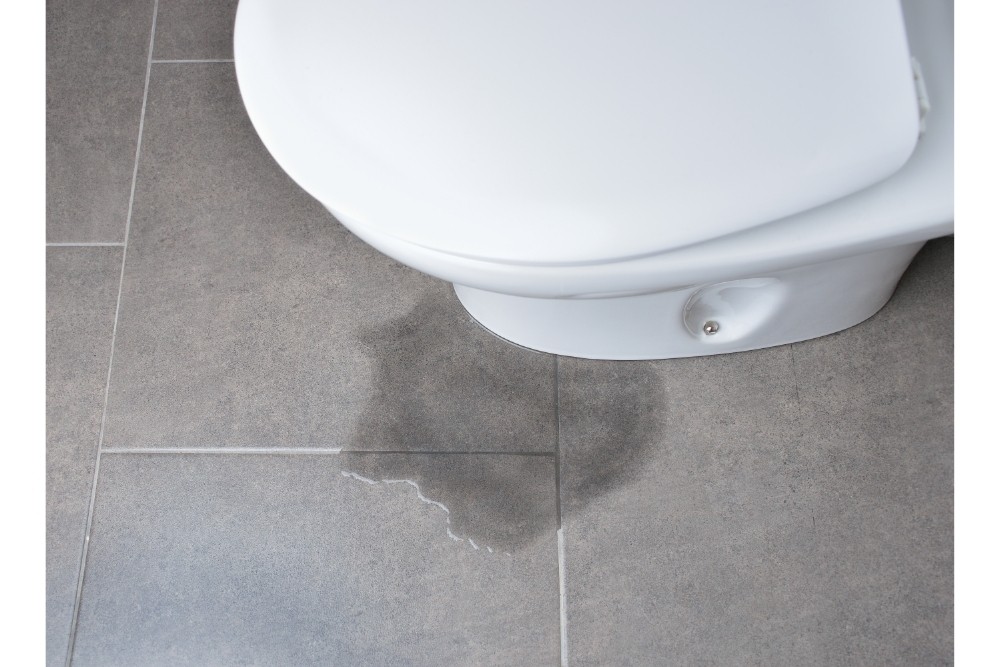
When you walk into your bathroom and see that your toilet is leaking your first instinct may be to panic – but don’t. Toilet leaks are a common problem and can be easily fixed with a little bit of DIY.
Here, we’ll take a look at why your toilet may be leaking at the base, what tools you need to fix the leak, and – most importantly – how to fix the leak.
Why Is my Toilet leaking?
Firstly, let’s take a look at the possible causes of your toilet leaking. According to recommended local plumbers, the most common reasons are:
- The tee bolts are loose: The base of your toilet is held to the ground with two bolts. These are called tee-bolts. When the bolts are loose, the toilet may rock and cause the wax ring to break.
- The wax ring has broken: While the cause for a wax ring breaking is usually because the toilet is loose, it may just have worn down over the years and become less pliable.
- There’s a loose water supply line: If you notice that your toilet is always leaking and not just when you flush it, it may mean that there’s a loose water supply line. To check the nut and rubber seal are tight, check the connection where the supply line connects to the tank.
- Condensation on the toilet: Toilet water and porcelain are usually cold. A humid room causes water to drip down from the porcelain on the bowl, and that’s when you’ll notice water pooling at the base of your toilet. We go into more detail about this below.
- Cracked Bowl: Is there a crack visible the water is leaking from? If so, it’s time to shop for a new toilet, here’s some of the best dual flush toilets reviewed. You might also be interesting in reading our Icera or proflo toilet reviews.
What tools do I need to stop my toilet from leaking?
- Bathroom Cleaner: It is crucial to clean the base of your toilet with an antibacterial bathroom cleaner to ensure the leaking toilet water is clean.
- Rubber Gloves: Fixing a toilet base leak can be messy, so make sure you have gloves to protect you from germs.
- Cleaning Cloths: Fixing a toilet leak is a messy business so make sure you have plenty of cleaning cloths on hand. We recommend Terry cloth and microfiber towels.
- Wrench: Use an open-ended wrench to remove the nuts and bolts that keep your toilet sealed to the ground.
- Screwdriver: Depending on what toilet you have, you may need a set of screwdrivers to unscrew some toilet parts to fix the leak.
- Toilet repair kit: This includes washers, gaskets, toilet bolts, toilet wax ring, and a putty knife. Alternatively, you can also buy washers, toilet bolts, and other parts separately.
- Cordless Drill or Driver: As some of the nuts and bolts may be hard to remove manually, a power tool (like a cordless drill) will come in handy for removing tight bolts.
- Hacksaw: As some of the bolts may have corroded or been stripped, a hacksaw can make the process of removing them a lot less frustrating. Use the hacksaw to cut through the bolts at the base at the seat of the toilet, the plastic bolts on the toilet seat, or any other toilet bolts.
- Caulk: Having caulk is essential, as you will use this to reseal the edges of your toilet to the ground.
Now that you have all the tools, let’s move on to how you fix the leak.
Steps To Fix A Toilet Leaking From The Base
Is it Condensation?
Firstly, check for condensation. Before you start unscrewing bolts check the outside of your toilet to make sure the problem isn’t being caused by condensation. If condensation is to blame, try the following tips to prevent water pooling at the base of the toilet:
- Install a tray.
- Insulate your water tank.
- Make sure your flapper isn’t faulty.
- Take shorter showers at a cooler temperature, and turn the fan on. If this is not the problem, keep investigating the source of the issue.
If condensation isn’t the problem, you can tighten the tee bolts. Remove the plastic covers from the base of your toilet on both sides.
Tighten the tee bolts
Then, use an adjustable open-ended wrench to tighten the tee bolts. This makes sure the wax ring that seals the toilet drain outlet is compressed.
If the tee bolts are tight enough and can’t be tightened any further, you may have to remove and reinstall the toilet so a new wax ring and bolts can be installed.
Once you have tightened the bolts, shut off the water to your toilet, and then disconnect and remove it. The shutoff valve is usually located on the left side of the toilet near the water supply tube and water valve tailpiece.
Replace the wax ring
To remove the nuts from the tee bolts use your wrench. If the tee bolts are corroded and won’t turn, use a hacksaw to sever the bolts. Be sure to drain the toilet, then you can remove the toilet by lifting it up and away from the floor drain.
You may need somebody to help you move the toilet if you would struggle to move it by yourself. To prevent damage to the toilet, set it on its side.
Then, remove the wax ring and install a new one. Begin by scraping away the old wax from around the drain opening, and make sure all of it is removed before you install the new ring.
Place the ring with the plastic cone facing down toward the drain. Always make sure that the tee bolts are placed correctly in the key openings on each side of the flange.
Now, you can reinstall the toilet. Lift it carefully and place it back over the drain so that the tee bolts can go through the holes on the base of the toilet with ease.
Next, press the toilet down onto the wax ring and rock it gently so the toilet compresses the wax and creates a tight seal.
You can then tighten the tee bolts and nuts with a wrench. They must not be over-tightened, as this can cause the porcelain to crack.
Finally, connect the waterline. You can reconnect the water supply tube to the fill valve and turn the water back on.
To check for leaks, flush the toilet after the toilet tank fills back up. If there are no leaks present, use the caulk to seal the base of your toilet.
Is your toilet still leaking? Don’t be dismayed, contact a local toilet plumber and let them know what you’ve tried to resolve the issue. They may give some advise or call in to fix the problem for you.


