There’s no need to have the whole bathroom refitted just because you’re starting to get bored of the same old style, as making small changes like an upgraded new faucet will make all the difference. You’ll be surprised by how something so small can completely transform the look of your bathroom.
If you are renovating your bathroom, you’ll likely already be aware of how quickly costs can start to add up. Doing some of the smaller jobs yourself is a great way to cut costs and keep the overall budget much lower, and you’ll pick up some useful skills along the way.
So, don’t fancy forking out for a professional plumber to come out and do a job as simple as replacing an old or leaky faucet? Ignore your fears about flooding the bathroom, because changing a faucet is actually much easier than you might think and it’s something that can be done in just a couple of hours, so no need to set aside a whole day for it.
We’re talking about bathroom faucets in this article, but the same principles we’re about to share with you apply when you’re replacing a faucet in your kitchen as well.
What You’ll Need
Every good handyman or woman needs their tools, so round up your supplies before you start. Some you might have lying around the house, or some you might need to seek out specifically for the job. Wherever you find them, here’s a list of what you’ll need:
- Adjustable wrench and basin wrench
- Bucket
- Towel
- Measuring tape
- Plumbers tape
- Sponge or scrubber
- Rag or cloth
- New faucet
Out With the Old…
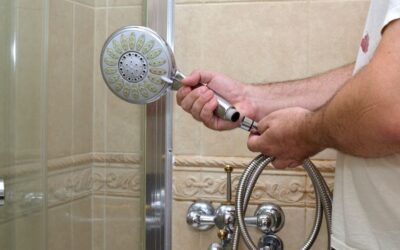
Before you can get started, to keep those fears from becoming a reality you’ll need to make sure you’ve turned off your water supply. Locate the shut-off valves under your sink and turn them off, leaving them to drain so there’s no water left in the pipes.
Disconnect the old faucet by cutting the supply lines and remove the lift rod. Also remove the nuts which are typically found underneath and then you can remove the faucet.
You might want to take a photo of how the plumbing fits together so it’ll be less like trying to complete a jigsaw puzzle when you come to reconnect the faucet.
Drain Removal
Does the faucet match the drain? If so, you’ll need to change this over as well. Just like before, start by taking out the old one. Grab a bucket to catch any water and carefully dismantle the P-trap.
Remove the drain and wipe over the holes where the old drain and faucet used to be using the sponge or scrubber to remove any mold and remaining silicone sealant in preparation for the new one to go in. Best to start off with a clean sink, after all.
In With the New!
First things first, make sure when you’re looking for a new faucet that you choose one which will align with the pre-cut holes in your sink. The options include center-set, widespread, or single hole and you’ll know which you have once the old faucet has been removed.
It’s much trickier to install the faucet retroactively once you’ve mounted the sink, so if it’s possible, be sure to this before your sink is in place. This won’t always be the case if you’re replacing the faucet alone, so here are some step-by-step instructions that will help you.
- Insert the gaskets. This is the rubber or plastic layer that seals any gaps between the faucet and the sink so it won’t start leaking when the water is turned back on. You can also use sealant or plumbers putty to make sure it’s fully sealed by applying a thin layer directly to the edges of the holes prior to installing the gasket.
- Wrap the tailpiece up with plumbers tape to ensure there are no loose threads, making sure you don’t exceed the pipe’s edge. Although this isn’t an essential step, it will also help to prevent water from leaking.
- Install the faucet. Carefully align it with the sink mounting holes and lower the faucet into place. When you’re happy with the positioning, place the washers on the tailpipes and manually tighten the nuts. Use a wrench to complete the job with an extra quarter turn if you think it needs it. Be careful not to over tighten, however, as this could cause damage to the sink.
- Reconnect the supply. Starting with the faucet pipes, attach the supply hoses to the end and manually tighten the nut. Again, you can finish it off with a wrench. When they’re securely attached, reattach the other end of the hose to the water supply using the same method. For copper pipes that have threaded fittings, you’ll need to keep the copper pipe steady while you attach them, as otherwise, they might end up twisted and could potentially break.
Turn On and Test!
You’ve done a great job following our instructions up until now, so let’s put your progress to the test. It’s time to try out the new faucet. All you need to do is flush the system and do a quick spot check for any leaks that may immediately show up.
Double-check the connections are all securely tightened and put the aerator back in its place. Perform the checks by running the hot and cold water for a couple of minutes without the aerator. No leaks in sight? Good! You’ve successfully replaced your bathroom faucet!
Final Thoughts
Was that so difficult? If you really run into trouble, you should be able to find plenty of helpful videos on YouTube where people will provide a visual run-through of each of the steps we’ve covered here.
We would like to point out that you should always follow the manufacturer’s instructions for installation, but if you follow the guidance we’ve provided here then you should have a newly-fitted, functional faucet that will only cost you as much as the materials.
The only question left is, what DIY maintenance will you try out next?