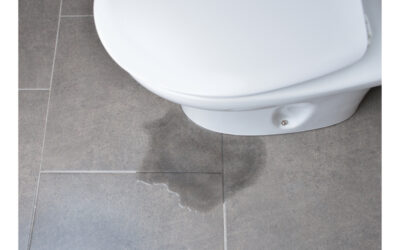
Showers are great places to relax after a long day at work or school. They also provide a chance to get clean before heading out in the evening. Unfortunately, showers aren’t always pleasant places to spend your time. Sometimes they leak water, causing damage to the floors and walls. Sometimes the hot water goes cold, and sometimes the shower simply won’t turn off at all!
Key Takeaways
- Immediate Step: Turn off the main water shutoff valve and plug the drain.
- Tighten Faucet Handle: Use a screwdriver to tighten the handle’s screw.
- Replace Cartridge for Two Handle Faucet: After water shutoff, replace the cartridge in the shower handle.
- Replace Valve for Single Knob Shower: Turn off water and replace the valve assembly in single knob showers.
- Repair Ball Shower Faucet: Shut off water, release pressure, then replace the ball faucet.
- Seek Professional Help: If problems persist, consult a local plumber in your area.
What you need to do when your shower won’t turn off
When you’ve finished your shower and turn off the faucet, but the water continues to pour out from the faucet or showerhead it can be a daunting task to figure out what to do. Don’t panic – there are some steps you can take to figure out the problem.
Turn off the main water shutoff
The main water shutoff should be located in your basement near the front foundation wall. This part of the house is usually within the first several feet of where the main water enters. The handle can come in two forms, a “wheel” or a lever. If you don’t have access to a basement, the water shutoff should be in the crawl space near your water heater. Turning off the water at the main shutoff valve will turn off the water throughout your entire home, so your shower should stop running. After shutting off the water, always open a faucet before beginning a repair to release pressurized water from the pipes.
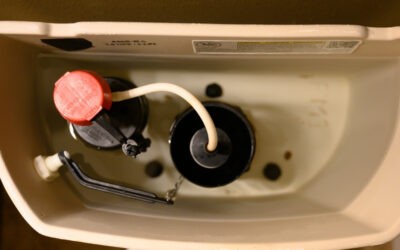
Plug the shower drain
Before disassembling anything, we recommend putting a plug in the shower drain. This will ensure that no screws or cover plates get lost in the pipes.
Fixing A Shower Faucet That Won’t Turn Off
Depending on the type of shower faucet you have, different fixes will apply. Below are 4 ways to fix a shower not turning off for the most common shower faucets.
Tighten the faucet handle
One of the most common causes of leaking showers is loose handles on the faucets. When a handle loosens up over time, it allows water to seep through the fixture. This means that when you try to shut off the water flow, nothing happens.
To avoid this problem, tighten all the screws holding the faucet’s handle down. You can do this by using a screwdriver to remove the cover plate on the faucet. When you have done this, you should be able to see the screw, which will need to be tightened.
To see if the method has worked, you will need to turn the faucet handle and determine whether the water is working correctly. If the faucet still won’t turn off, you may need to tighten the handle more or try an alternative method.
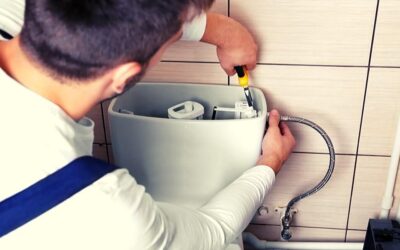
Replace the cartridge (Two handle faucet)
A cartridge is one of four types of valves that you’ll find inside a faucet. Cartridges work great in shower faucets since they regulate water flow and temperature and create a better seal than other types. They also allow you to set an accurate temperature when you turn the handle. A shower that won’t turn off is often due to an issue with the cartridge. If you notice any signs of leakage around the cartridge, then you should replace it immediately.
To replace the shower cartridge, turn off the water again. Turn the hot and cold water on and put the drain stopper into the drain – that way you don’t lose any hardware. Unscrew the handle, take off the cartridge, and make a mental note of how the cartridge was aligned. Remove the clip and use vice grips to remove the cartridge. If it feels stuck, you should call a plumber. Grease the new cartridge and insert it into the shower, making sure the hot and cold sections of it line up with the old cartridge. Put everything back together and test.
It is important to remember that not all cartridges are the same. Some brands work better than others. Therefore, before purchasing a replacement cartridge, check online reviews to find out what other customers think about the brand.
Replace the Hot/Cold assembly pieces (Single knob shower valve)
If replacing the cartridge doesn’t solve the inability to shut off the water, you may have to replace the individual assembly pieces of the faucet. Start by shutting off the water and opening hot and cold faucets in other rooms to relieve pressure. Unscrew the handle and remove it. Take off the beauty ring and escutcheon plate. Using a wrench, loosen and pull out the cold and hot shower valves. Screw the replacement valve assemblies into position, and tighten with a wrench before putting everything back together.
Repair a ball shower faucet
In some cases, your shower may feature a ball faucet and a single handle. If this is the case, then you may need to repair the faucet to stop the flow of water. To do so, follow these steps:
- Turn off both the hot and cold water supplies.
- Check to see if there is any leaking around the area where the faucet meets the wall.
- When the water has been turned off, remove the faucet to release pressure. This will help to reduce mess and other problems while completing the job.
- Remove the handle and set it aside.
- Take off the handle cap and set it aside. Be careful when doing this, as you could cause damage to the gear and other fixtures.
- When this has been done, you should be able to remove the ball shower faucet. It is important to remember the placement of the faucet, as you will need to put it back in the same place.
- In the faucet, replace the seats and tighten the nuts. Make sure that the threads have been tightened correctly.
- Reinstall the handle and turn on the water supply. You should now be able to use your shower again.
Conclusion
These tips should help you to fix issues with your bathroom’s shower faucets. In most cases, fixing the problem yourself is easy enough.
However, if you are having trouble finding the right parts or tools, then you shouldn’t hesitate to reach out for help. Best Plumbers Club can connect you with local plumbers in California, top Philadelphia plumbers and nationwide. Our members are standing by ready repair leaking showers or replace your faucets, getting the job completed quickly and efficiently.